
 How to Make a Floating Shelf (Beginner-Friendly)
Floating shelves always look amazing—and yes, they can feel a little intimidating at first.
But here’s the truth: they’re much simpler than they look.
I’ve made a couple for my own bathroom, and once you understand the basic idea, it really clicks. You’re just building a simp
le box that slides over a hidden support. That’s it.
If you can make straight cuts and use a drill or nailer, you can do this.
 What You’re Building (Simple Breakdown)
You’re making two parts:
- A hollow shelf (box)
- A hidden wall bracket that the shelf slides onto
Think of it like a sleeve that fits snug over a support.
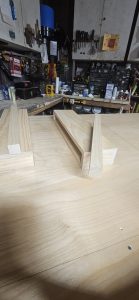
 Step 1: Decide Your Shelf Size
Start by choosing:
- Length (how long your shelf will be)
- Depth (how far it sticks out from the wall)
- Thickness (how “chunky” you want it to look)
There’s no wrong answer here—just go with what fits your space.
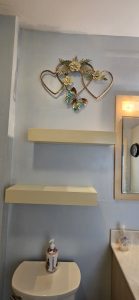
 Step 2: Cut Your Wood Pieces
You can use just about any wood you like.
You’ll need:
- 1 top piece
- 1 bottom piece (same size as the top)
- 1 front piece (same length, but not as wide)
- 2 side pieces
 The side pieces should:
- Match the depth of your shelf
- Match the height (thickness) of your front piece
No fancy cuts needed—simple 90° cuts work perfectly.
 Step 3: Build the Shelf Box
Now assemble your box:
- Attach the sides between the top and bottom
- Add the front piece last
You can use:
- Brad nails + wood glue (great for a clean look)
- Or screws if that’s what you’re comfortable with
Take your time and keep everything lined up nice and square.
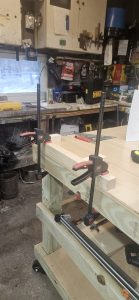
 Beginner Hack
If you notice small gaps in your seams, don’t worry!
Mix a little wood glue + sawdust, press it into the seam, let it dry—and sand it smooth.
 It practically disappears.
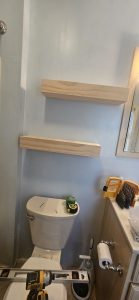
 Step 4: Sand and Finish
Sand your shelf until it feels just right to you.
- Start around 120–220 grit
- Then move to a finer grit for a smooth finish
Then finish it however you like:
- Stain
- Paint
- Clear coat
- Even decals for a personal touch
Make it yours—that’s the fun part.
I painted mine pale yellow to match my bathroom
 Step 5: Build the Hidden Bracket
This is what holds everything up.
You’ll need:
- 1 board mounted to the wall (slightly shorter than your shelf)
- 2–3 “arms” sticking out from it
The arms should be:
- Slightly shorter than the depth, and width and length of your shelf so you box can slide on.
- Evenly spaced (ends + middle if needed)
The longer your shelf, the more support you may want.
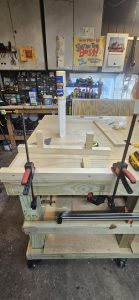 I also love this Tight Bond Glue.
 Step 6: Mount the Bracket to the Wall
- Decide where you want your shelf
- Use a level (don’t skip this!)
- Attach the bracket securely
If you hit wall studs—perfect 
If not, use wall anchors rated for the weight you plan to put on the shelf.
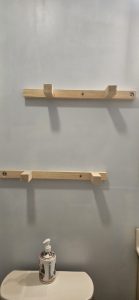
 Step 7: Slide the Shelf On
Once your bracket is secure:
- Slide your shelf box right over it
That’s the magic moment—it suddenly looks like it’s floating.
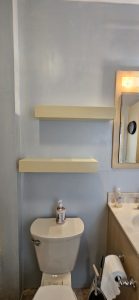
 You Did It
That’s it—you just built a floating shelf.
No complicated joinery. No fancy tools. Just simple steps and a little patience.
If yours isn’t perfect? Good. That means you’re learning—and your next one will be even better.
Want More Simple Projects?
If you enjoyed this, check out more beginner-friendly builds and woodworking hacks over at WoodworkingGarage.com—that’s what this space is all about.